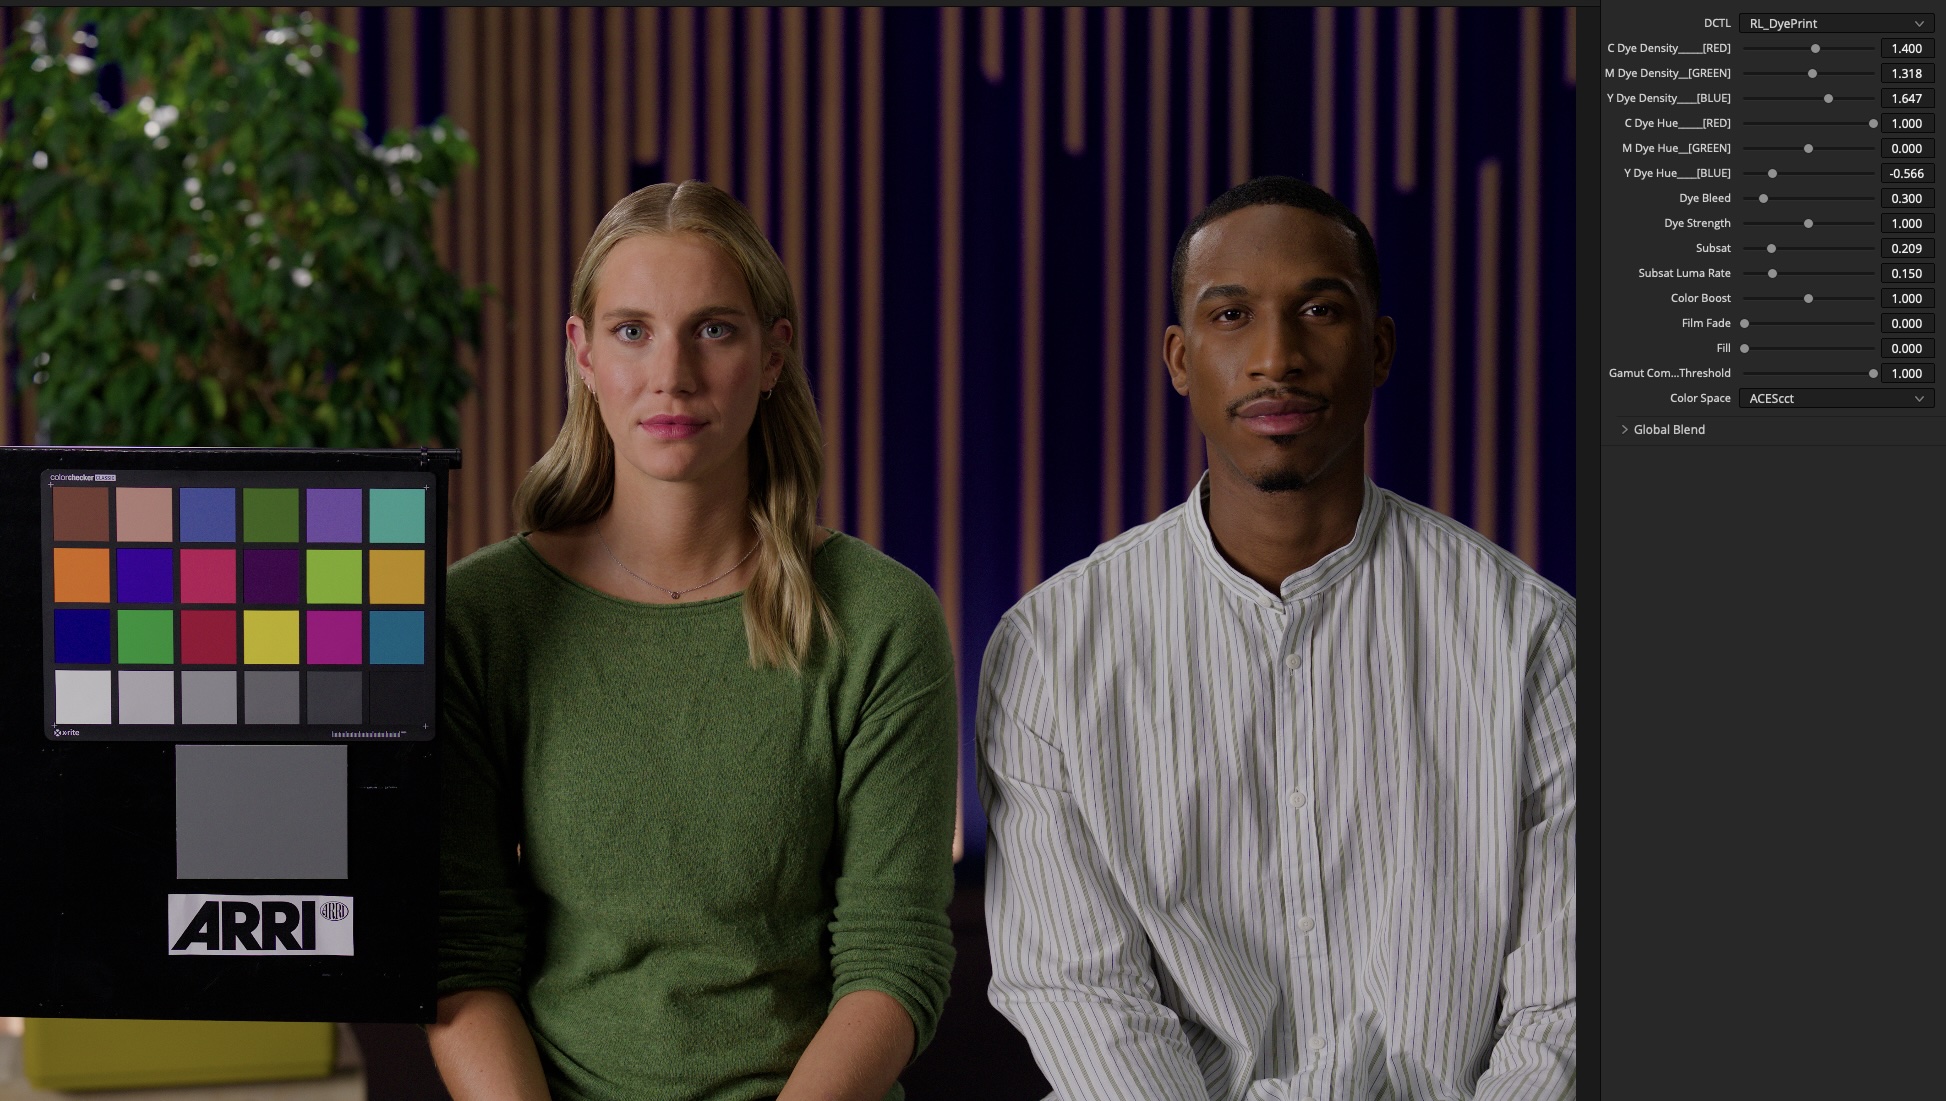
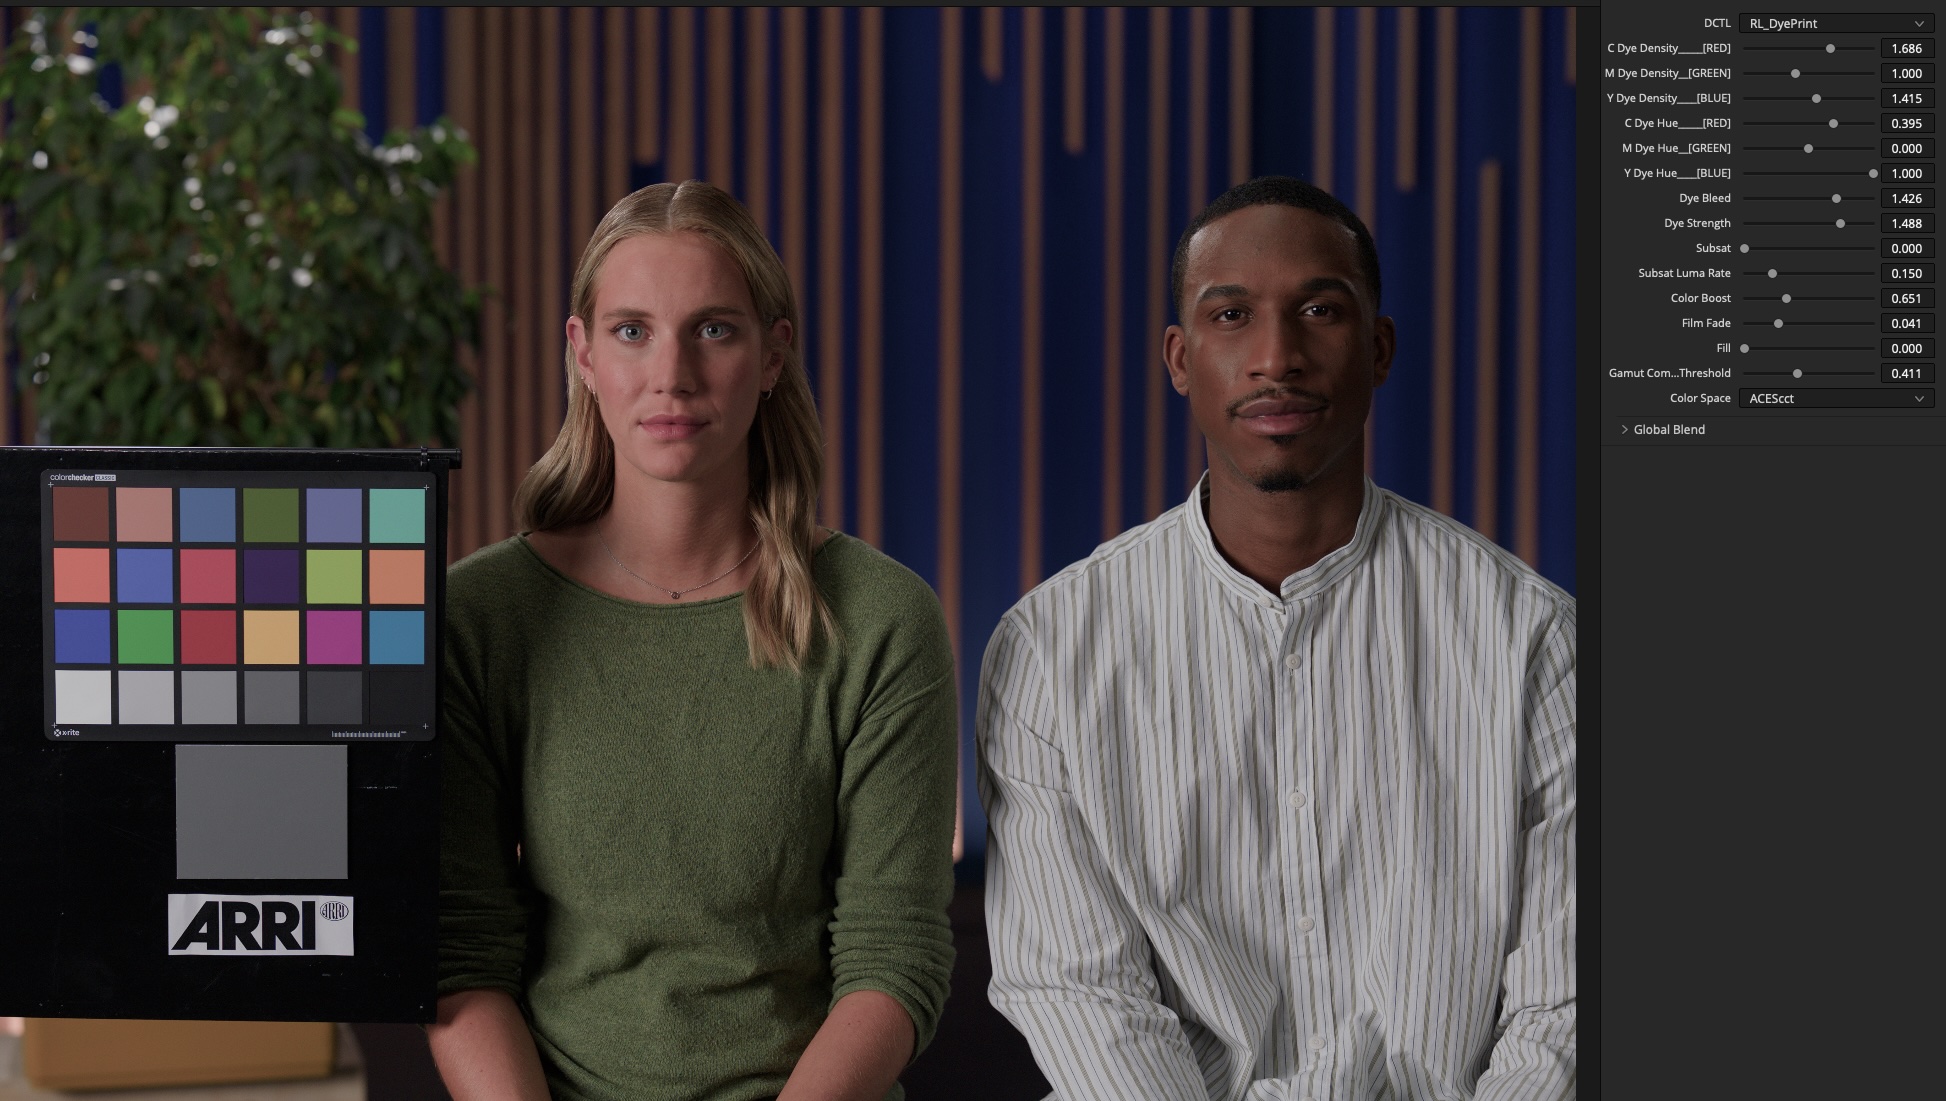
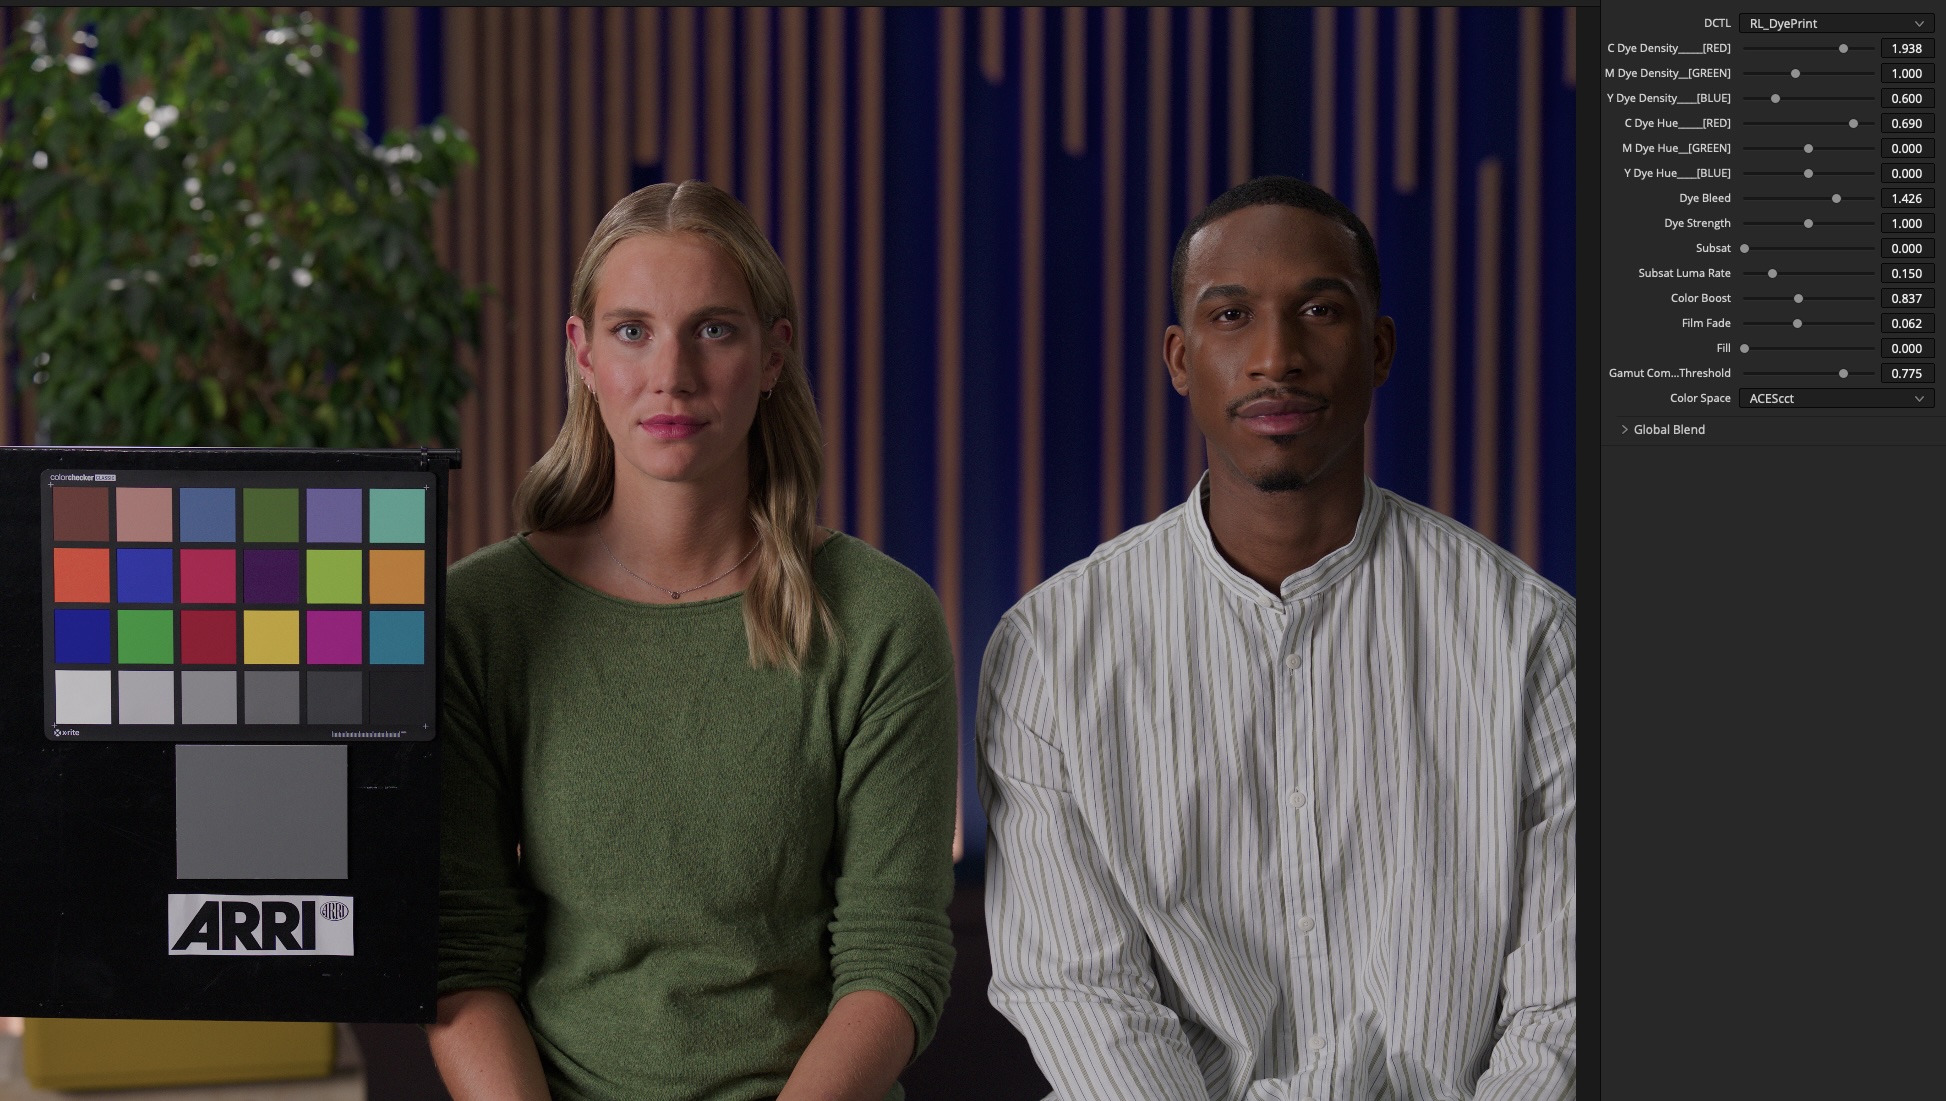
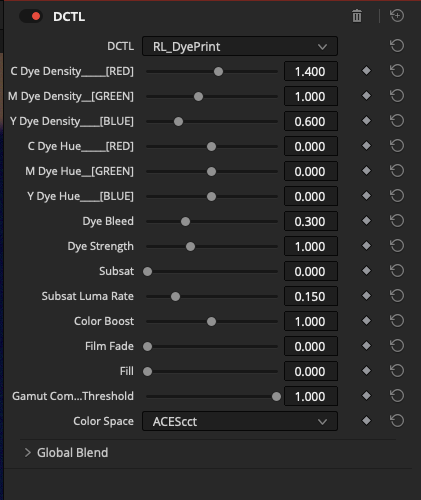
DyePrint is a look development tool that models a 3-strip dye imbibition film process as a DCTL for DaVinci Resolve.
Each dye record has independent density and hue controls for complete customization of the look.
Saturation and film finish tools let you build on top of the process to arrive at the look you want.
The 3-strip dye imbibition process worked by capturing each color channel on a separate monochrome film strip, then transferring Cyan, Magenta, and Yellow dyes onto the final printed layers. DyePrint models this with individual density and hue controls for each dye to build a matrix that shapes the overall color of the image.
Controls red saturation and separation. Higher density pushes more contrast into reds and cyans; lower density softens and pulls them back. The hue trim shifts the record's influence toward green or blue.
Controls green saturation and rendering. Pull it back for a cooler, flatter midrange; push it up for richer greens and warmer, denser complexions. Hue bias skews the record toward red or blue.
Controls blue saturation and rendering. Lower density gives a cooler, blue-leaning image; higher density warms the grade and compresses blue separation. Hue trim tilts between green-yellow and orange-yellow.
A set of included presets to explore as starting points. Each can be taken further with the individual controls.
In a dye imbibition print, the three dye layers aren't perfectly isolated - each bleeds fractionally into the others. This interaction gives the process a lot of its color character. The Dye Bleed control adjusts how much each record crosses into its neighbours, scaled by the individual density of each layer.
Each channel is printed cleanly from its own record. colors are more separated and the image reads with higher chroma contrast between hues.
Records mix across channels. The image takes on a warmer, more complex color quality - hues blend at the edges of saturation rather than clipping apart.
A matrix is built from the dye density, hue, and saturation settings, shaping how color is rendered across the image. Two additional tools work on top of that.
Adds saturation and density, weighted around middle-grey. The Luma Rate dial controls the density - how much luma is dropped per unit of saturation.
Increases saturation selectively in areas of low chroma. Fully saturated colors are left alone. Useful for recovering subtle hues that the dye matrix may have compressed or flattened.
Two tonal controls that sit at the end of the chain, after the dye matrix and saturation tools. They work in log space, so they behave correctly across all supported color spaces.
Lifts the blacks slightly for faded shadows. Midtones and highlights are not significantly affected.
A gentle luminance lift that targets the lower midtones. Adds some body to the shadows without clipping or shifting hue. The effect rolls off softly into the highlights and deep shadows.
DyePrint decodes your log footage to scene-linear, runs all dye operations in linear light, then re-encodes back on the way out. You stay in your native log space throughout.
A hue-preserving compression that rolls high-density colors back within the gamut boundary. Avoids hard clipping or hue rotation in heavily saturated grades, while maintaining the desired dye-print look.
Every dye record, bleed amount, saturation tool, and film finish control is in a single DaVinci Resolve DCTL panel. Set your color space, and start adjusting.
From Retrograde Labs
Timeline-based Dolby Vision metadata inspection, quality control, editing, and export.
Learn more →Volumetric foliage and grass grading with skin protection. Isolate and adjust greens in AP1 linear colorspace while complexions stay untouched.
Learn more →A collection of free Python scripts, DCTL effects, and Fusion tools for DaVinci Resolve.
Browse tools →